I'm assuming you already have a working DeployStudio setup, and followed the previous steps to create, seed, and track a .torrent file.
Install Scripts
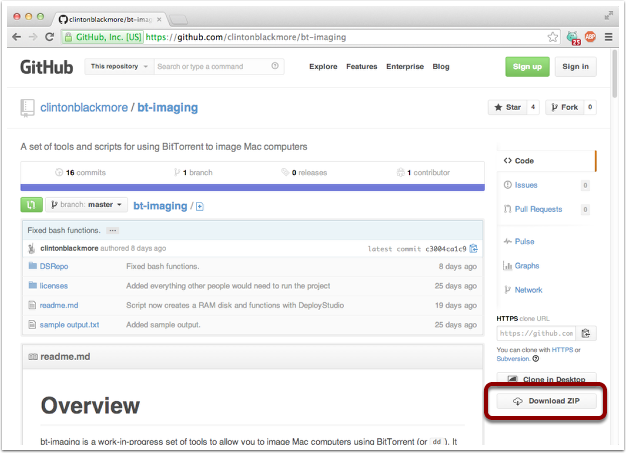
Go to https://github.com/clintonblackmore/bt-imaging and click on the "Download ZIP" button to get the bt-imaging scripts.

Copy it to DeployStudio
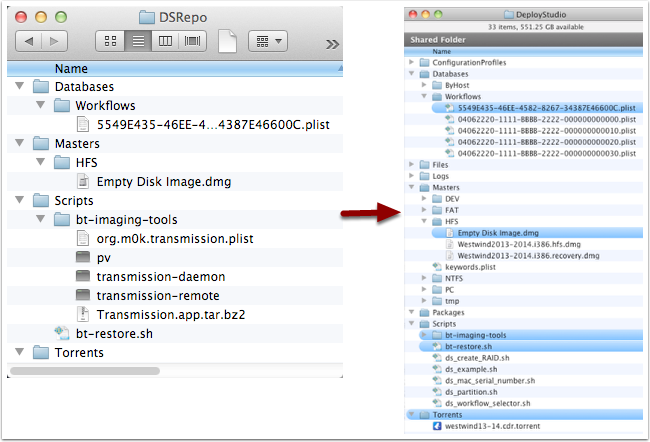
In the extracted archive, you'll find a 'DSRepo' folder, with files and subfolders. Carefully copy the files or folders to your DeployStudio repository/sharepoint.
You will want to place your .torrent files in the Torrents folder.
Note: the files included may vary by version of the script.

Sample Workflow - Part 1
I have included a workflow. Here is what it looks like in DeployStudio Admin.
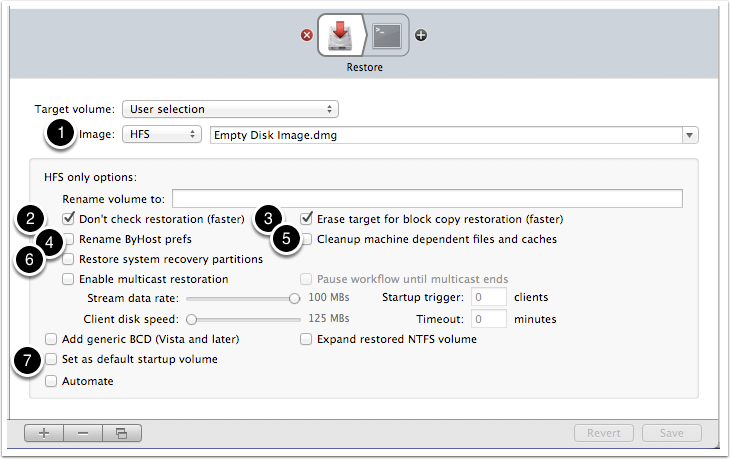
This first step is actually optional, and only adds a few seconds to the imaging process. It makes it much easier to work with the bt-restore script as a regular user can choose which hard drive partition to image (or you can specify the target and automate it in advance).
[You may skip this step, but you'll need to specify the name of the volume to overwrite. Don't count on the /dev/disk number as being the same as when not booted in DeployStudio].
Important things here:
- We are restoring the 16 kb "Empty Disk Image.dmg" file.
- Don't bother checking the restoration
- Yes, we want to block copy.
- Don't waste time renaming ByHost prefs -- there aren't any.
- Don't waste time doing cleanup.
- There is no corresponding 'Empty Disk Image.dmg' for the recovery partition. Skip it.
- We can't set it as the default startup volume. There is no information to boot with on it at this time.

Sample Workflow - Part 2
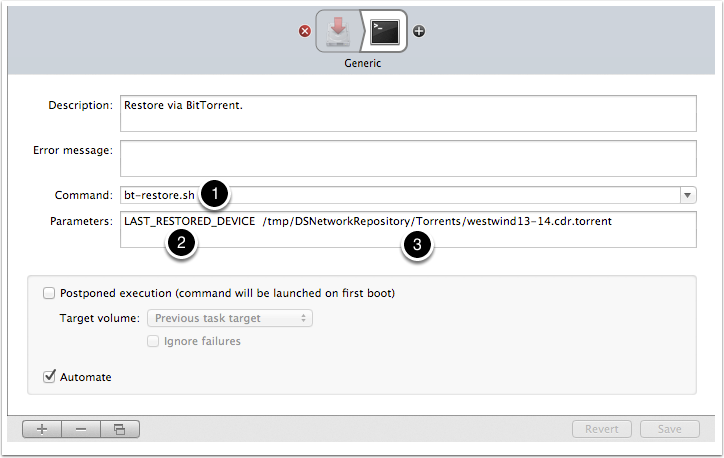
Here is where we actually run the bt-restore script.
Important things are:
- We are running 'bt-restore.sh'
- Specify a volume to restore to. It could be "/Volumes/Macintosh HD" or "/dev/disk20s3" or "LAST_RESTORED_DEVICE". The last one is a special flag that tells the script to ask DeployStudio which drive was chosen on the (optional) previous step.
- Specify where to find the torrent. It should be in /tmp/DSNetworkRepository/Torrents/.
Note that the command-line parameters may change in future versions.

Restore
Bring up a client you'd like to image, and try it out!
The End.