Now it is time to setup software and create a torrent.
We are going to use Vuze. (Other options, such as qBittorrent, should work as well). Download it and read the options carefully as you install so as to avoid add-ons you don't want. Then fire it up.
Prepare to Turn On A Tracker
Vuze comes with an internal tracker, but we need to turn it on first.
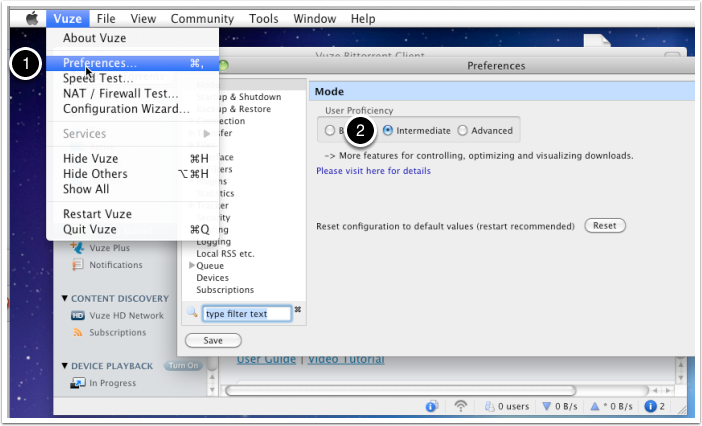
- Go to Vuze -> Preferences...
- Set the mode to "Intermediate." (The tracker server options are not available to a beginner).
Turn on the Tracker
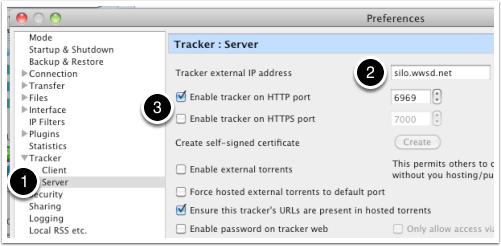
- Choose Tracker -> Server from the menu pane.
- Type in an appropriate IP address for your server.
- Enable the tracker on HTTP or HTTPS.
I left all other settings at their defaults; some of them sound promising for improving performance on a LAN.
Hit the "Save" button in the lower left corner (not shown) and close the preference window.
New Torrent - Set Tracker
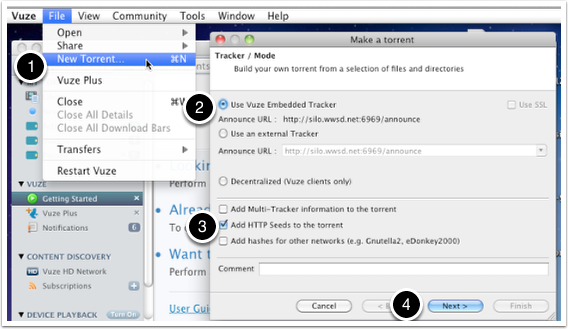
- Choose File -> New Torrent.
- Use the Vuze embedded tracker
- If you are using an HTTP seed, click the appropriate box.
- Next.
New Torrent - Set Webseed
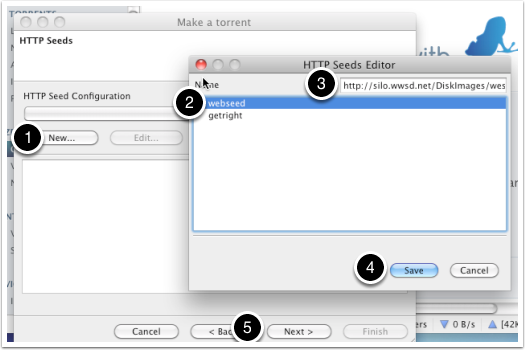
If you are using a web seed,
- Hit the "New..." button.
- Hilight "webseed"
- Paste/type in your URL
- Save
- Next
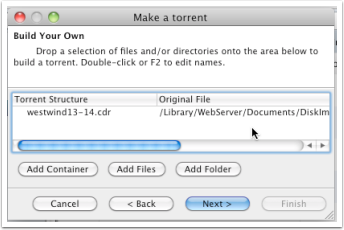
New Torrent - Add One File
Drag and drop your raw disk image onto the "Make A Torrent" window, and hit Next.
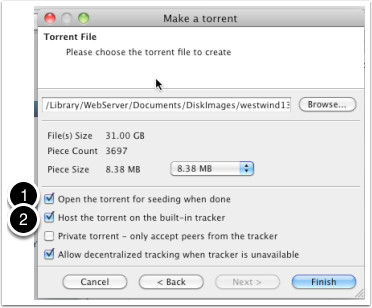
New Torrent - Set Options
At the very least:
- Open the torrent for seeding when done. (Possibly optional, if you are web seeding, but recommended).
- Host the torrent on the built-in tracker. (This is the whole point of the exercise!)
The best settings for the other options are unclear to me. On a LAN, large pieces seem sensible. [If you have recommended settings, please e-mail clinton.blackmore+bt_imaging@gmail.com].
Hit the "Finish" button.
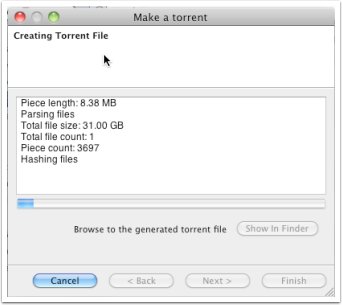
Hurry Up And Wait
The computer will now calculate checksums for every single piece in the torrent file. It took about 7 minutes for it to generate a torrent for a 31 GB file for me.
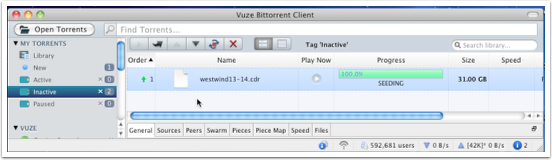
Final Result
The torrent is done, and is being seeded from this computer. Now that the seed shows up as being 'inactive' -- nothing is connected to it.
One more thing to note -- you can right click on the torrent's entry in your list and tell it to "Force Start" and "Pause" if you feel like it.
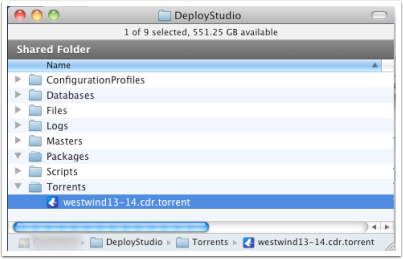
Copy Torrent For DeployStudio
Lastly, copy your resulting torrent file into your DeployStudio "Torrents" folder (creating the folder if it doesn't already exist).
IMPORTANT: If your raw disk image is named "myawesomeimage.cdr", your torrent must be named "myawesomeimage.cdr.torrent" (or the script will not be able to create the necessary symlink to restore the file to a disk partition device).
Next: Using BitTorrent With DeployStudio